A Brief Update
9 December 2019 - FredOK, I’m feeling a bit under the weather so this may end up being a bit shorter than usual. Here we go. Before our last meeting, Peter was unfortunately wrapped up in University coursework and slept through the start of the meeting. I wish I was sleeping right now. The rest of the news will keep me awake though I think.
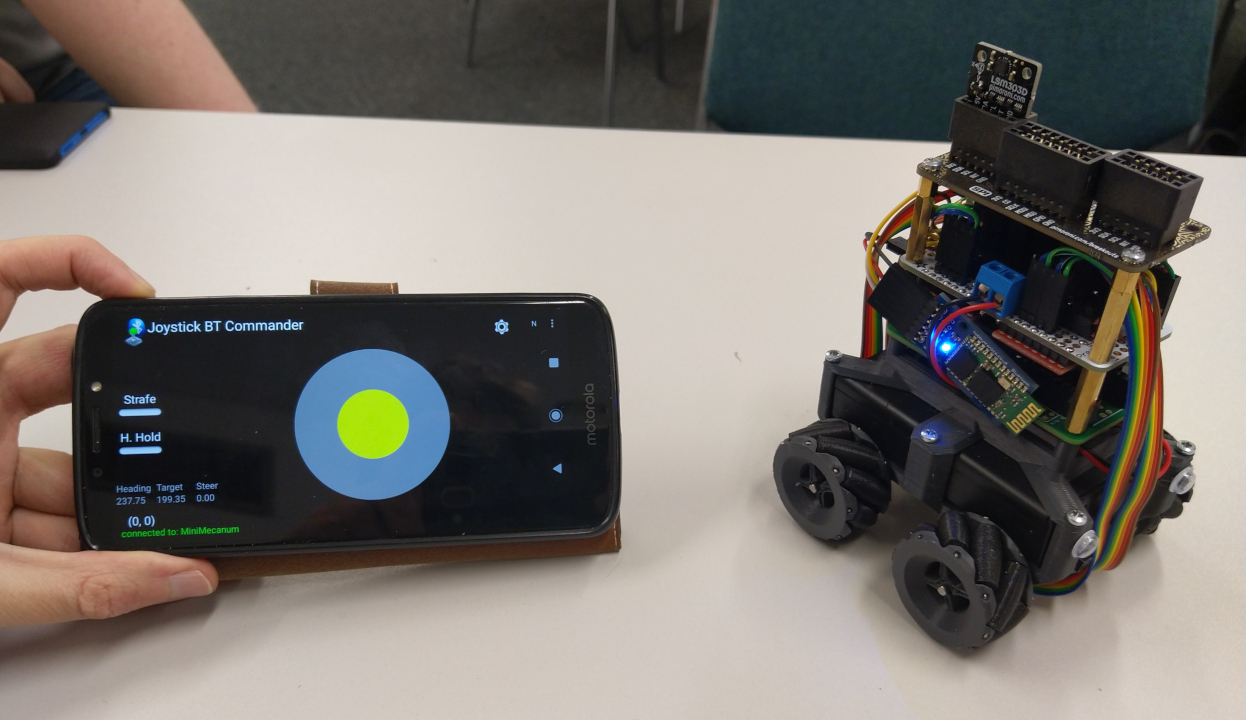
Let’s start with where we left off at the end of the previous post. Chris has made some good progress on the drive system. He’s re-written his proportional integral derivate (PID) controller for velocity control. This means now that the Teensy he has doing low-level motor control reads the motor encoders and ensures the wheels are moving at the proper speed, adjusting power to each motor so that they all spin at the same rate. The Teensy will connect to the Pi over USB to control the motors. For testing, he’s got another Teensy programmed with the PID on his mini-mecanum with a Bluetooth module. We played around with it some at the meeting and it works really well! Chris has also been playing around with using a magnetometer (digital compass), but hasn’t had much luck getting that to work well yet.

Speaking of control, Harry now has an Arduino Mega successfully receiving data from a radio controller for remote control. This will give us 6 channels (axis, dial, or switch) of input, which should be more than enough for the manually drive challenges. On the robot the Mega will actually be a second Teensy dedicated to sensor input, and also connect to the Pi via USB. To help visualise how our electronics will work for us to plan out assembly and wiring, Harry’s created a block diagram. This is part of the electronics design coming together - we’re going with fairly beefy TLE5206 motor drivers.
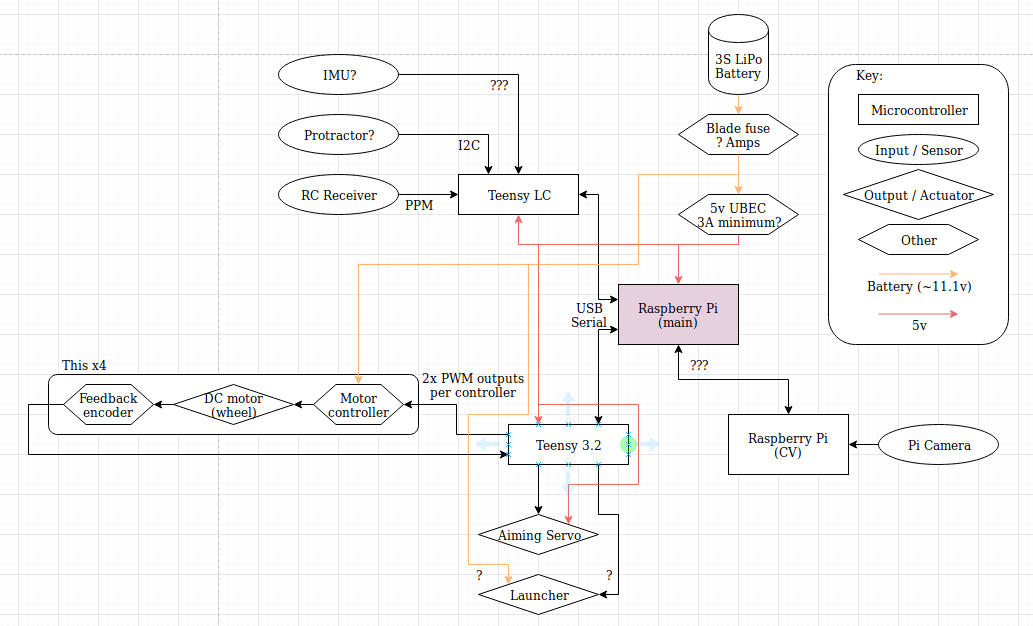
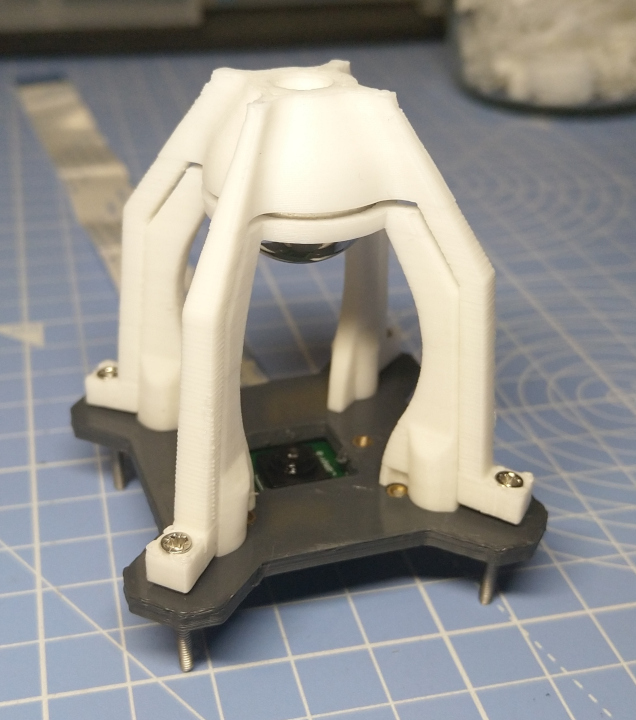
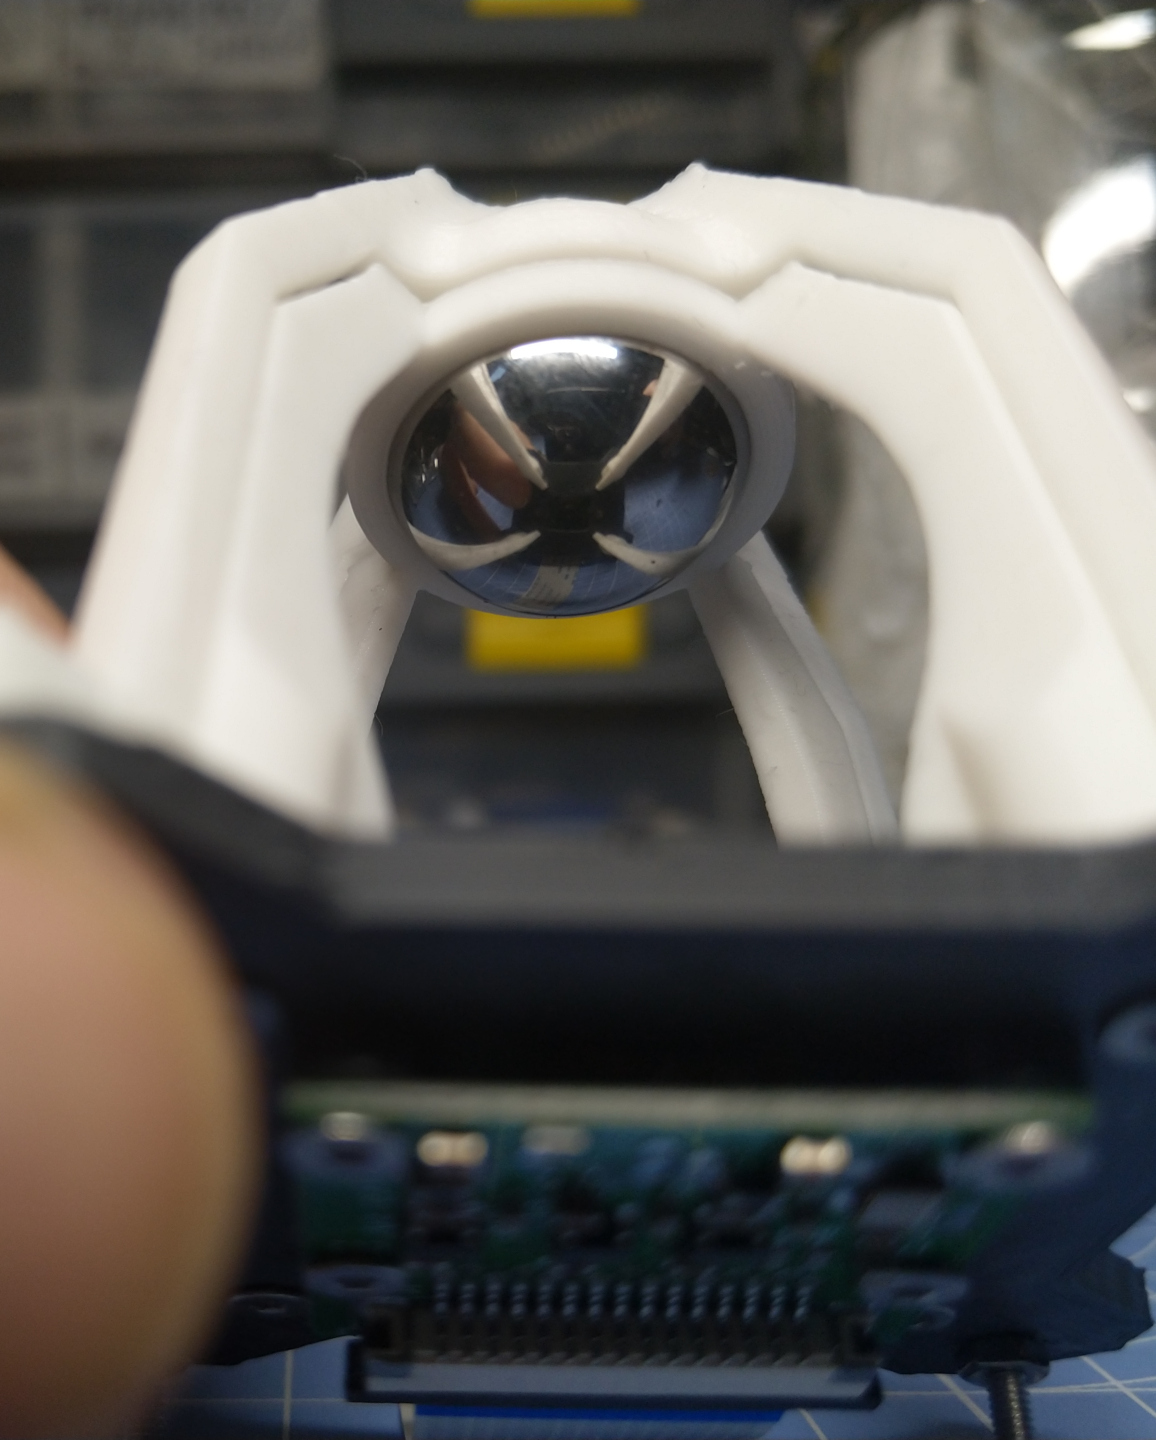
If you look at the block diagram, you’ll that there are two Raspberry Pis! We’re taking a modular approach, with a lot of duties off-loaded from the main Raspberry Pi so that we can work on several parts of the robot in parallel. The second Raspberry Pi will run Blayze’s computer vision system. If you recall, this consists of a Raspberry Pi Camera looking up at a ball bearing. You can see below that Blayze has finished designing, 3D printing, and assembling the first version of the mount. I wasn’t sure I believed it at first, but the ball-bearing really is very shiny and reflects well. I’m more convinced having seen this now. The whole mount will sit on top of the robot. And if it doesn’t work very well, our modular design system will let us substitute in alternate camera/sensing systems.
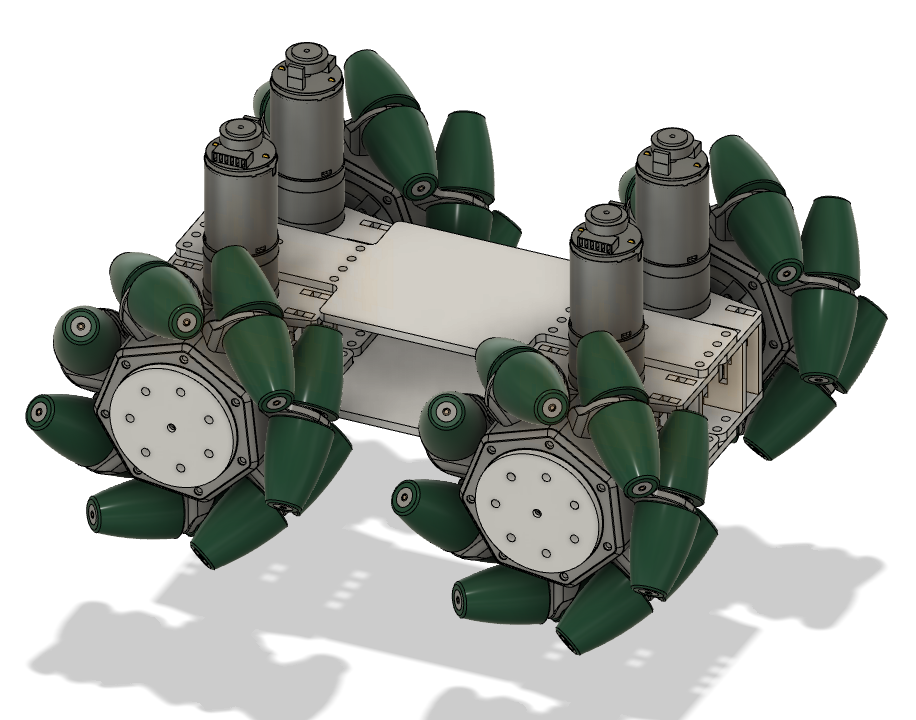
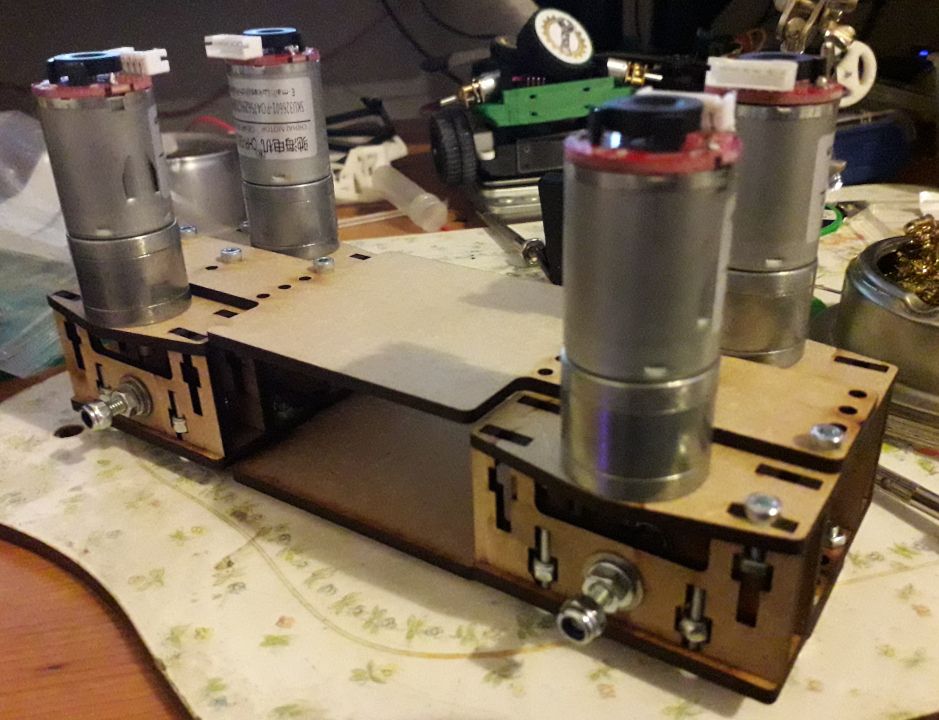
All of the motors, electronics, and vision stuff sit on top of a chassis of course. Which we now have a prototype of! Robbie has been working over time to get the first chassis revision designed, laser cut, and assembled. Our mecanum wheels are in the mail, but you can see how it should look in the design. (Until the mecanum wheels arrive, we’ll be using some regular wheels for testing.) It’s really nice to see things coming together - motors, chassis… The bevel gears are 3D printing, and those bearings that were hard to find are in too! The hardware team is having a meeting today fitting more of the hardware together while I write this, which should hopefully see the whole thing rolling in some fashion, and help them get a better understanding how it will all fit together. (I’ve just been informed that things indeed have been fit together, but I’ll save that for the next post to keep you guys coming back!)
Finally, at the heart of the robot sits the main Raspberry Pi, which at the moment looks like it will be using the piwarsimulator I started developing. This is a test platform to simulate how the robot will tackle the AI challenges. As it stands, the simulator is programmed with a simulated eco-disaster environment that the robot tries to navigate to sort the barrels. It doesn’t do this terribly well for now as I haven’t yet implemented collisions or circumnavigation - that’s on the to do list. Click play on the video below to see the simulator in action!
How will the piwarsimulator control the real robot? I’ve written it in such a way that we can override the executeMove() and executeRotate() functions to send motor commands to the motor Teensy and override the Scan() function to receive input from the sensor Teensy of computer vision Pi. Then each challenge will have an appropriate RobotBrain to tackle that challenge. With this and the hardware, I’m really pretty stoked as lots of stuff will be coming together all at once. Will it all work on the first try? What random segments of code will group together to form unexpected protocols? Will the robot for some reason seek out the light, or group up with others rather than stand alone? Will it take on a life of its own with a ghost in the machine, have a personality, or be something more? Will it one day have secrets… dreams?